SailPack-Vision is a free tool for image measurements. Just load an image, digitize shape stripes, measure distances and angles, superimpose other images and save measurements.Here are some tips that can help you to use this software.
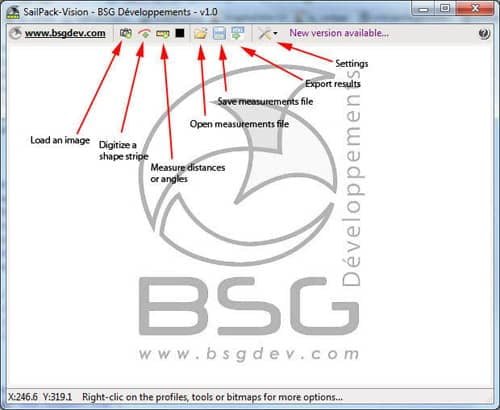
Interface
Zoom: using the mouse wheel
Pan: using the right mouse button
Actions on an element can be accessed right-clicking on it.
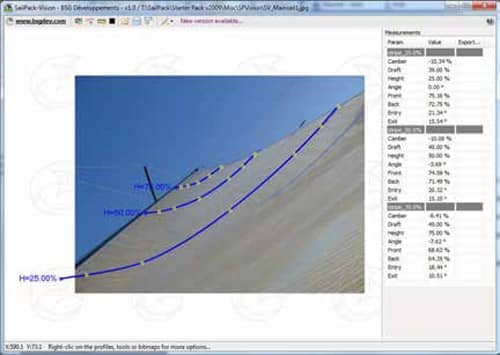
How to digitize shape stripes on an image:
A secondary toolbar appears:
The software tries to adjust the digitized shape stripe to the one from the picture. To adjust manually some control points, just drag and drop them at the appropriate position.
To add a control point, keep the ‘shift’ key pressed and click the image where you want to add the point.
To delete a control point, keep the ‘ctrl’ key pressed and click on the control point you want to delete.
Once the shape stripe is digitized, right click on it and click on ‘Custom height’ and enter the height of the profile.
Repeat this process for all the shape stripes.
The shape stripe properties are displayed in the right column of the window.
If you want to measure the twist of the shape stripes, you need to digitize a virtual shape stripe that you will set as your twist reference.
The reference can be for example a spreader if you know its angle. Just digitize it (same process as for a shape stripe) and right-click on it and select ‘set as twist reference’. Enter the angle of this reference and the ‘angle’ parameter of all the digitized shape stripes will be calculated using this reference.


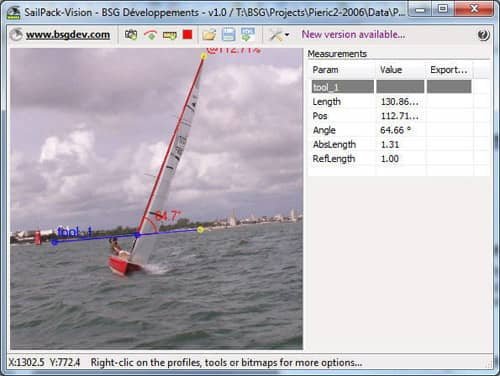
The blue line is the reference, the red one represents what you want to measure. Just drag and drop the control points of the reference and measurement lines. If you right click on the tool you can modify some options:
The measurements are displayed in the right column of the window:

Here is a sample of angle measurement: the heel is 90-64.66 = 25.34°

Here is a sample of distance measurement: the spinnaker vertical depth is 33.5%
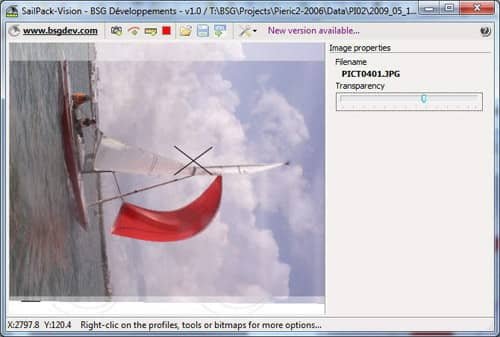
The second image appears over the reference image. If you click on this image, you have the image properties that appear on the right column of the window. You can adjust the transparency of the second image with the corresponding ‘slider’.
If you want to modify the second image:
If you right click on the image, you can freeze its position pressing the button ‘fixed position’.
If you want to orientate quickly the second image so that 2 of its points get superimpose with 2 other points within the reference image, you can right click on the second image and select ‘Set position with 4 points’.
Then select 2 points in the second image and the corresponding 2 points in the reference image. After this, the second image should be translated, rotated and scaled to have a perfect match between the selected points.

To load or save measurement files, just use the corresponding buttons in the main toolbar.
When you close the software, it asks if you want to save the current measurements in a file associated to the loaded image. If you answer yes, the next time you open the same image, the associated measurements will be automatically loaded.
In the left column of the window, you can enter some comments and general parameters (TWS, TWA, BS…). They will be saved in the measurement files.
In the main toolbar, if the message ‘New version available’ appears, just click on it to update the software.
For more information, please contact BSG Dévelopements: support@bsgdev.com